Tutorial
Creating an Accounts Payable Report
The purpose of this tutorial is not only to help you gain familiarity with Click, Drag & Drill reporting, but also to provide you with step-by-step instructions to create a functional report.
• Multiple Sort Levels
• User-Defined Fields
• Text Fields
• Report Regions:
Page Heading
Group Headers
Group Footers
Multiple Detail Lines
• Page Footing
• End of Report
• Region Property Enhancements
• Macros
• User-Defined Selection Criteria
Accounts Payable Report Specifications:
The report is to be sorted in the following order: first by Ledger, then Vendor Name, then Status, and finally by Invoice Number.
The report Detail Line will contain the following elements: InvoiceNumber, Invoice Date, Description, Key, Object, JL Key, JL Object,Due
Date, PO Number, Check Number, Check Date, and Distribution Amount.
Negative Distribution Amounts are to be displayed in RED.
The report is to include a Group Header that contains Vendor ID and Vendor Name.
The report is to include the following Group Footers:
–Total Invoice Distribution Amount
–Invoice Status Total Summary (i.e., totals for Paid, Unpaid,Waiting Payment, and Reversed) and User-Defined Field"Vendor Net" which is derived by summing Paid & Unpaid invoices and then subtracting Reversed invoices.
The report is to utilize User-Defined Selection Criteria. You will be prompted to enter desired report start and end dates.
Create User-Defined field "Grand Total" that will represent the sum of all Vendor Nets.
Catalog Manager
Unless previously imported by your system administrator, you will need to indicate which table(s) you wish to utilize in your report. These will be the tables that you use to create your Information Categories. Our report will extract data from two tables: PE_NAME_MSTR and OH_DTL.
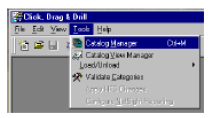
Select "Tools, Catalog Manager" from the main menu.
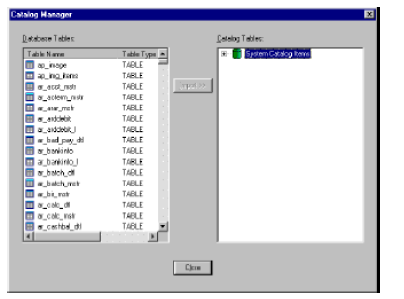
Choose the tables "pe_name_mstr" and "oh_dtl" from the database tables list and click Import. These tables will now appear in the Catalog Table list on the right-hand side of the window.If desired, you may rename your tables and the associated columns. To perform this function, select your first table, click your right mouse button and select the properties option. When the Catalog Item Properties window appears, select the Details tab.
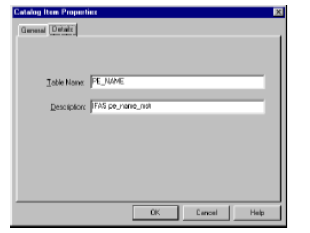
At this point, you may edit the table name as well as the table description. Upon completion, click OK.
To edit the associated columns, simply repeat the process described above for each of the column names in your table. Upon completion, click OK.
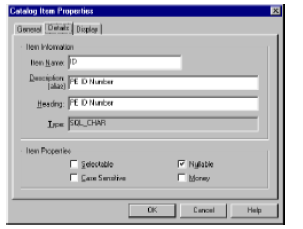
If you wish to edit a column format, select the Display tab in the Catalog Item Properties window. Additionally, you may edit the default size, mask, font and color. Upon completion, click OK.
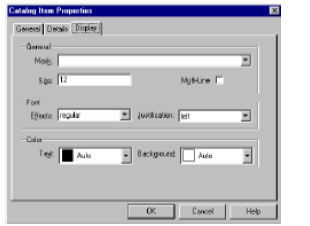
After you have imported and edited your tables, click Close in the Catalog Table Manager window.
Information Categories
Select "File, New" from the main menu….

Select "Information Category," and click OK.
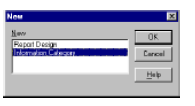
Select the tables (OH_DTL & PENAME) to be used in your information category and click Finish.
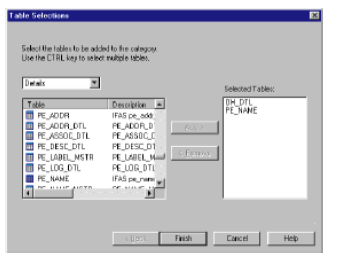
A table may be selected either by double-clicking on it, or by highlighting the item and then selecting the Add-> option. If you select an item in error, you may remove it by highlighting the item and then selecting the <-Remove option.
Establish an Inner Join between PENAME and OH_DTL. To do this, simply click the column PEID in the PENAME table and drag it over to the OH_PE_ID column in the OH_DTL table.
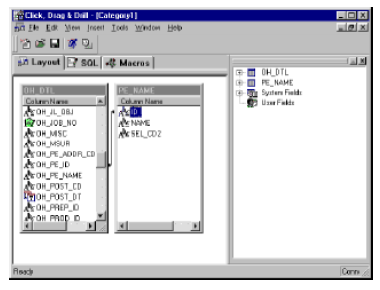
Save your new Information Category. Select "File, Save."
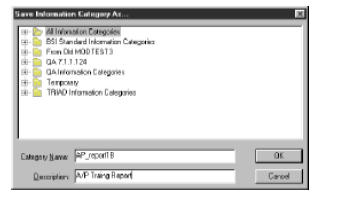
Assign your information category a name, description, and click OK.
Report Design
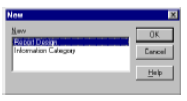
Select "File, New" from the main menu.

Select "Report Design," and click OK.
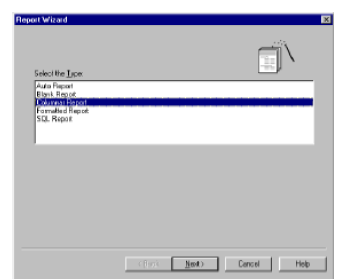
Choose "Columnar Report" and click Next.
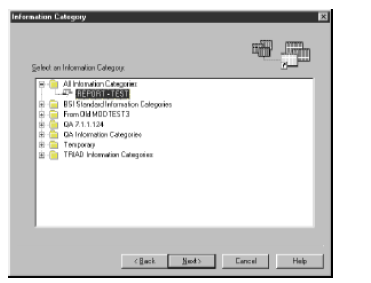
Choose the information category that you defined in the previous section and click Next.
Expand your available Database Items list by clicking on the " + " to its left in the Available Category Fields box.
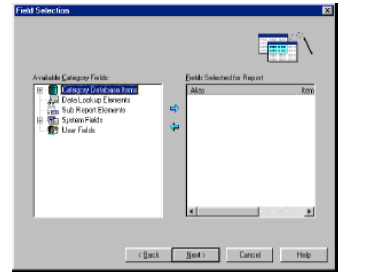
Select the following report detail items: Invoice Number, Invoice Date, Description, Key, Object, JL Key, JL Object, Due Date, PO Number, Check Number, Check Date, and Distribution Amount. You may select the items either by double-clicking on them or by highlighting the item and then clicking on the directional arrow, 

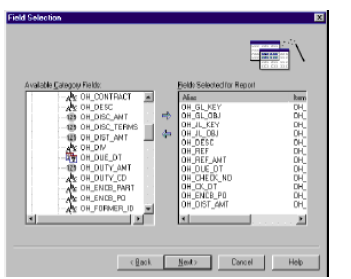
When all of your fields have been selected as noted above, click Next.
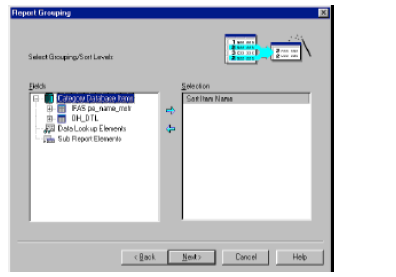
Define your Sort Items (ledger, vendor name, status, and invoice number) by selecting the desired items as described in step #6, and click Next.
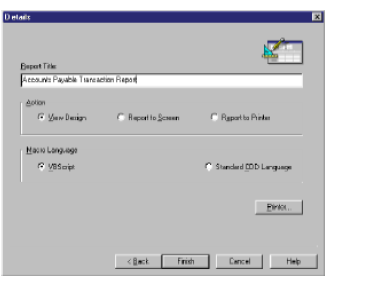
Enter your report title, and click Finish.
CDD automatically creates a "Rough Draft" according to the detail and sort items that you requested. Now you are ready to refine your report layout. You can re-label your report headings by simply double-clicking on a heading. A Report Object Properties window will appear that contains the selected item. Edit the item and click OK. Your new heading will be displayed immediately.
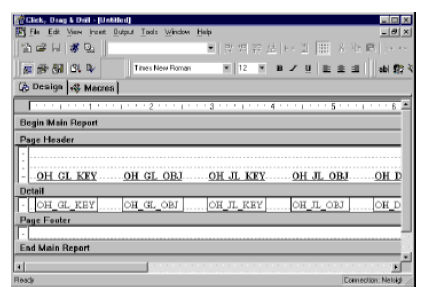
It is a good idea to periodically save your report throughout the design stage. Save your report by selecting "File, Save" from the main menu. Enter your report name, description, and click OK. For future saves, simply select "File, Save" from the main menu.
Create an additional detail region to be used for printing negative distribution amounts in red. With your cursor positioned on an "open" area of your report (i.e., not on a defined field or heading), right-click your mouse button and select "Insert" the "Region." Select "Detail" and click Next.
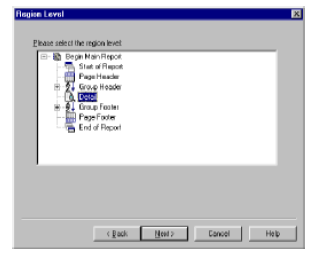
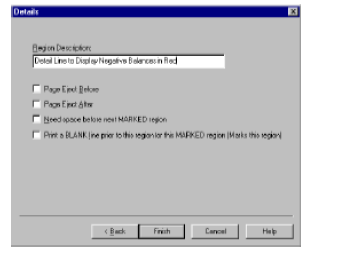
Enter region description and click Finish.
Note the additional detail region on your report layout screen. Populate your newly defined detail region with same fields that appear in your original detail region. To include these items, click the desired item from the data list, drag and drop it in the new detail region. Your new region will be a mirror image of your original region with the exception of the color of the distributed amount field.
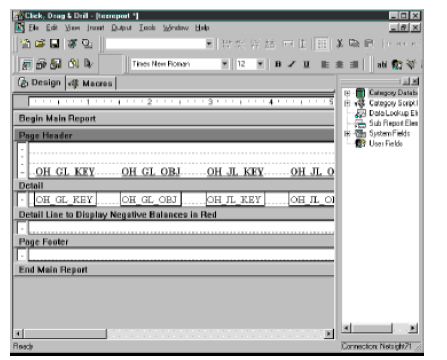
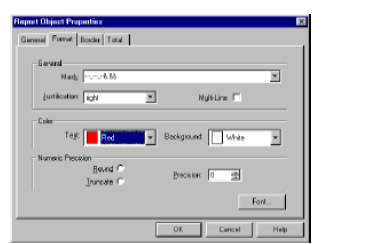
With your cursor positioned on the distributed amount field in your second detail region, double-click the item. The Report Object Properties window will appear. Select the Format tab, change the text color to Red, and click OK. When you return to your report design, the field will be displayed in red.
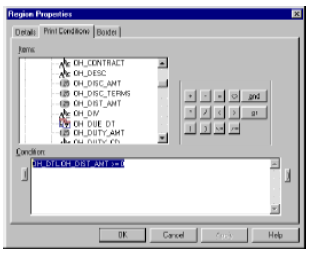
To specify when the new region is to be utilized, position your cursor in an open area of your original detail region; right click your mouse button; select "Properties" then "Region"; and click the Print Conditions tab.
Expand your Database Items list and select the distributed amount. Next click the ">=" button and then type in the number "0." Upon completion, click OK. This print condition states that a detail line will be printed in this region when the distributed amount is greater than or equal to zero (i.e., a positive number).
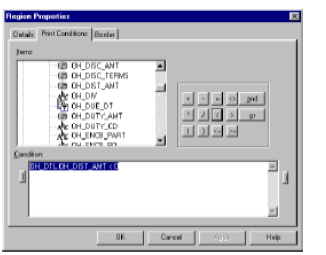
With your cursor positioned in an open area of your second detail region repeat the process described in step #16. This time instead of selecting records that are greater than or equal to zero, you will select records that are less than zero (i.e., negative values). Upon completion, click OK. This print condition states that a detail line will be printed in this region when the distributed amount is less than zero.
Group Headers and Group Footers
For our purposes, each time there is a change in the invoice number, the total distributed amount for that invoice will be calculated, and each time there is a change in vendor, a recap of the previous vendor's activity will be calculated and displayed. The recap will include a total for each status category as well as a vendor net.
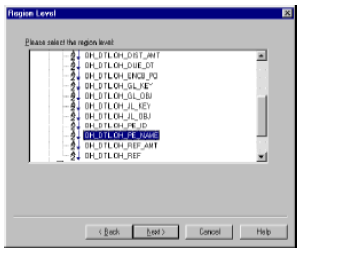
Right-click in an open area of your report design and select" Insert, Region" Group Header. Expand the Group Header Region Levels by clicking on the " + " located next to "Group Header."
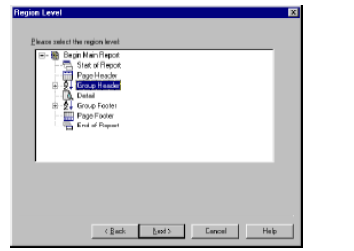
Select item name (i.e., OH_DTL.OH_PE_NAME) for this Group Header and click Next.
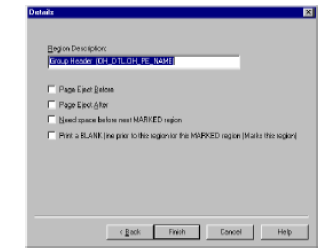
You may edit the Region Description if desired. Click Finish.
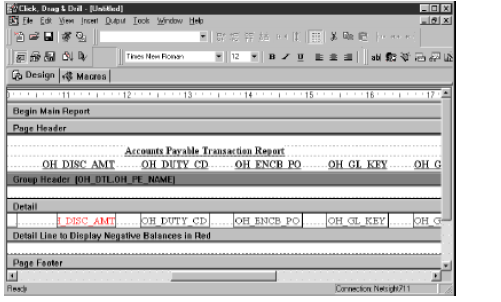
Note the new region "Group Header (OH_DTL.PE_NAME). Populate (i.e., drag and drop) this region with vendor ID and name fields.
Create three Group Footers (refer to steps #1 - #4):
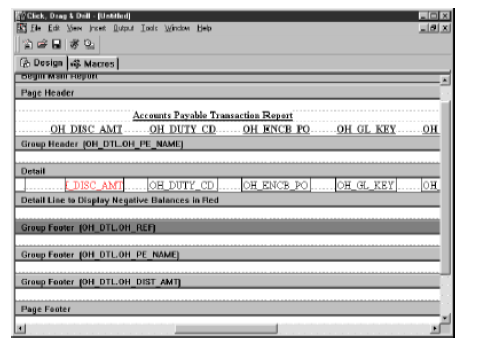
Create two Text Fields that will be used to label your Invoice Number and Invoice Total and position them in the Group Footer Region "OH_DTL.OH_REF." From your Database Items list, drag and drop the Invoice Number and Distributed Amount fields onto that same region.
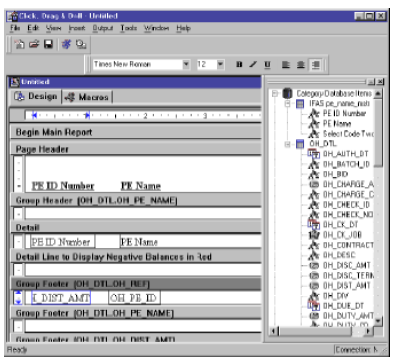
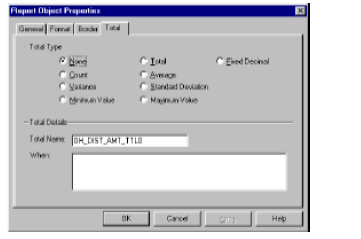
Change the Total Type to None in the Report Properties Box. To do this, you may either double-click your left mouse button with your cursor positioned on total field and select the Total tab, or by a right-click of your mouse button, select item properties, and select the Total tab from the Report Object Properties box. By changing the Total Type from Total to None, you eliminate the problem of duplicate addition.
User-Defined Fields
Follow the steps below to create five user-defined fields to hold the following totals. These fields will be used in the Vendor Name Footer Region. Be sure to set the total type to None in the Report Object Properties (refer to step #7 in previous section).
Vendor Paid (i.e. status = "PD")
Vendor Waiting Payment (i.e. status = "WP")
Vendor Unpaid (i.e. status = "DS")
Vendor Reversed (i.e. status = "RV")
Vendor Net (i.e. "PD" + "DS" - "RV")
Right-click your mouse button in an open area and select Insert, User Field. Enter the name, description, heading, and type for your User-Defined field, and click Next.
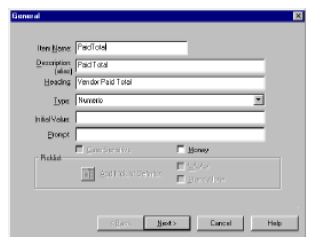
Select a mask (i.e., format for your field) and make any other desired changes. Click Next when complete. Repeat this process for each of your vendor status total fields. Note: each time you create a user-defined field, it will appear under the User Fields list in your Data Items list.
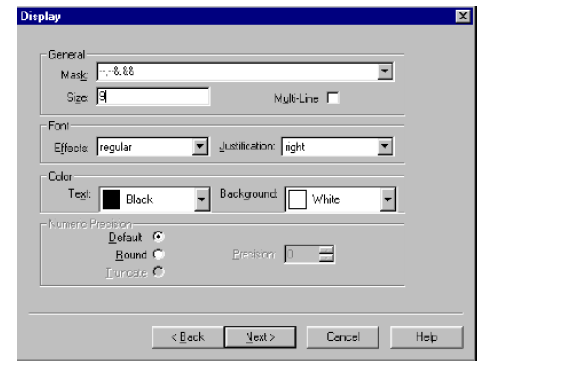
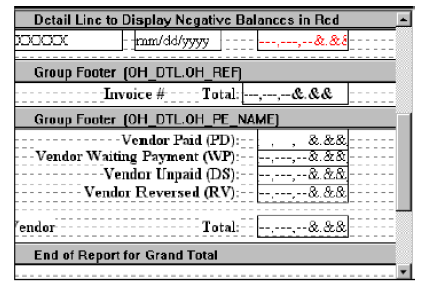
Once all of your fields have been defined, drag and drop them in the Group Footer Region "OH_DTL.OH_PE_NAME."
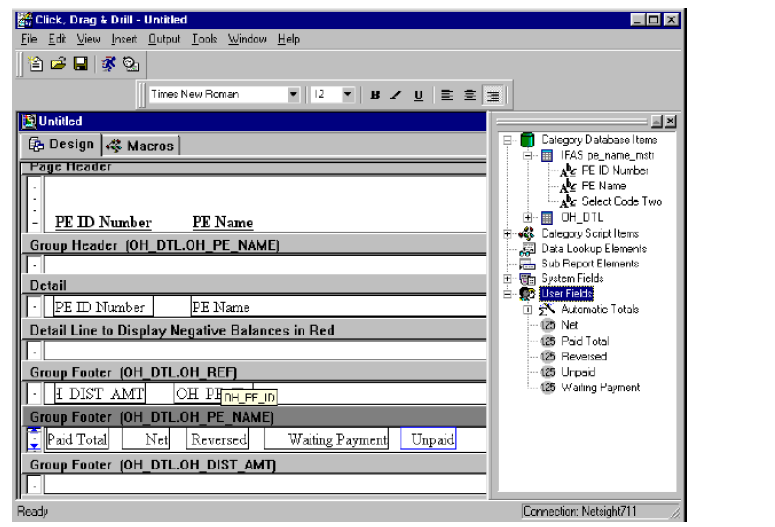
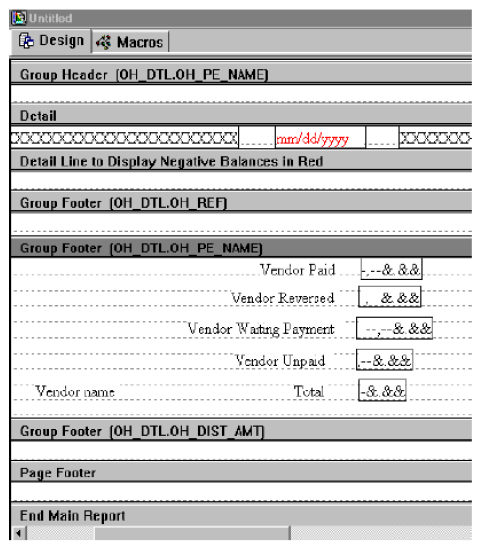
Create four Text Fields that will be used to label your Invoice Status Totals and two additional Text Fields to label your Vendor Name and Total. Position all of these in the Group Footer Region "OH_DTL.OH_PE_NAME." Your report design should resemble the diagram below.
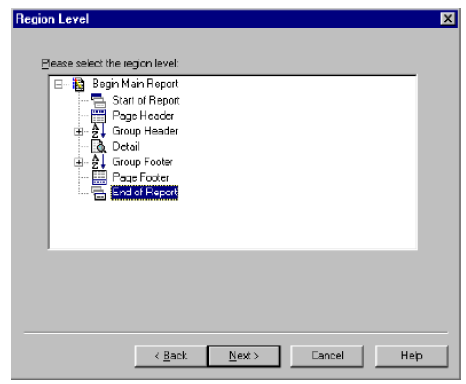
Create an End of Report region to hold the grand total. Right-click your mouse button and select Insert, Region. The Region Level window will appear; select End of Report, and click Next.
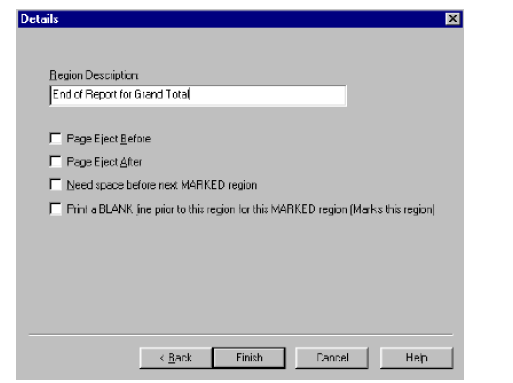
Enter the Region Description and click Finish.
Your report should resemble the example below.
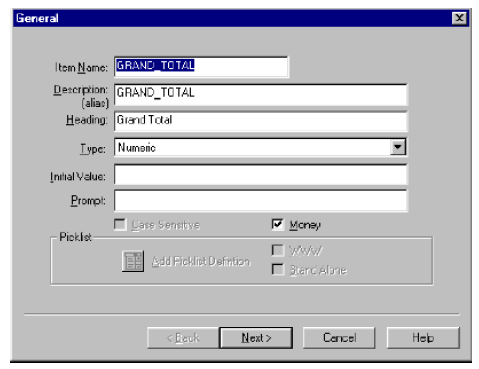
Right-click your mouse button in an open area and select Add User Field. Enter the name, description, heading, and type for your User-Defined field, and click Next.
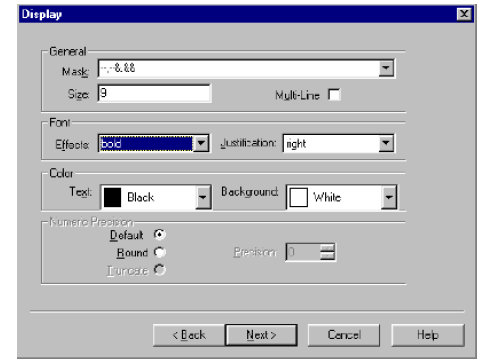
Select an edit mask and click Next.
No action is necessary in the Calculation window. Click Finish.
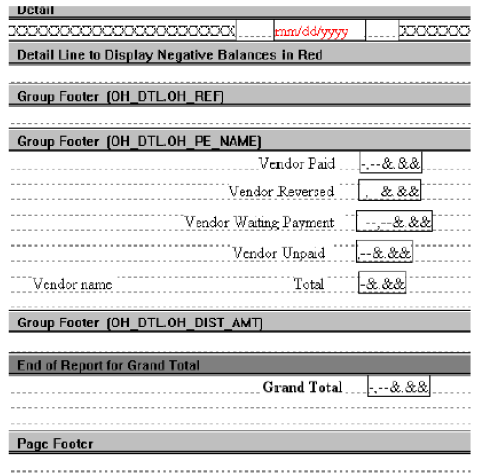
Create a Text Field that will be used to label your grand total and position it in the End of Report. From your User Defined Items list, drag and drop the grand total onto that same region.
Your report should resemble the above example.
Macros
The CDD Macro function enables you to further refine your report. The macro function will be utilized to accumulate the various invoice status totals. To access the Macro function, simply click the Macros tab within your report design window.
Initialize the Grand Total Field
Initialize your User-Defined Grand Total field. In the Local Routines field, scroll to Initialize. Type the statement "GRAND_TOTAL = 0" as appears below.
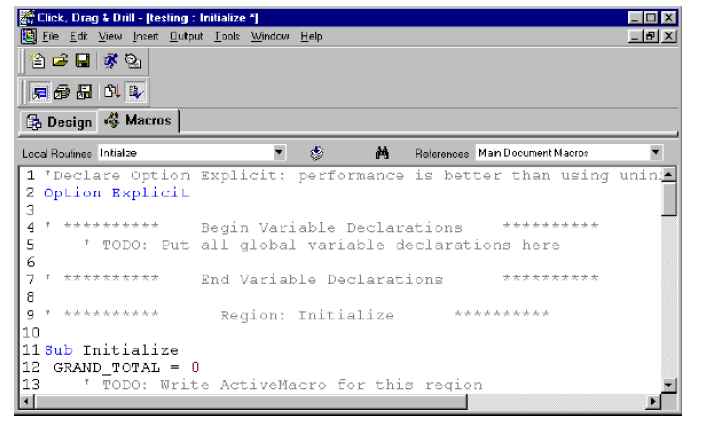
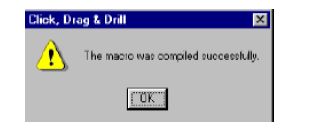
Once you have finished the statement, click the Compile key . The following message will appear:
Initialize Other User Fields
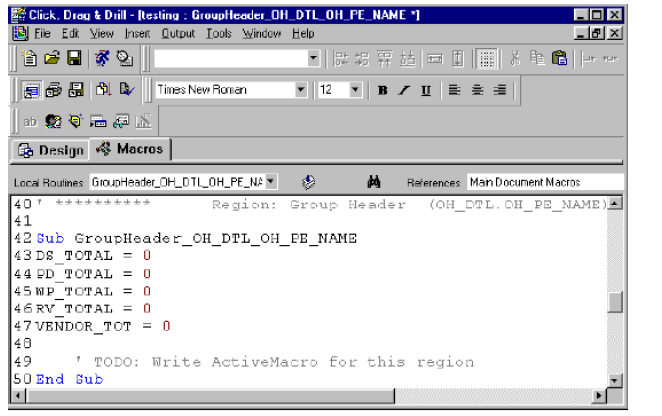
Initialize your other User-Defined fields, by typing the statements below after selecting the Group Header (OH_DTL.OH_PE_NAME) from the Local Routine field.
DS_TOTAL = 0
PD_TOTAL = 0
WP_TOTAL = 0
RV_TOTAL = 0
VENDOR_TOT = 0
The purpose of this macro is to initialize your totals each time there is a change in vendor. If this particular macro was not utilized, each time there was a change in vendor your totals would include all of the previous vendors as well. Your screen should look like the figure below:
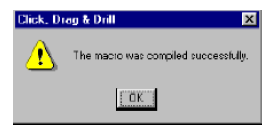
Once you have finished the statements, click the Compile key and look for the "Success" message.
Calculate Running Totals
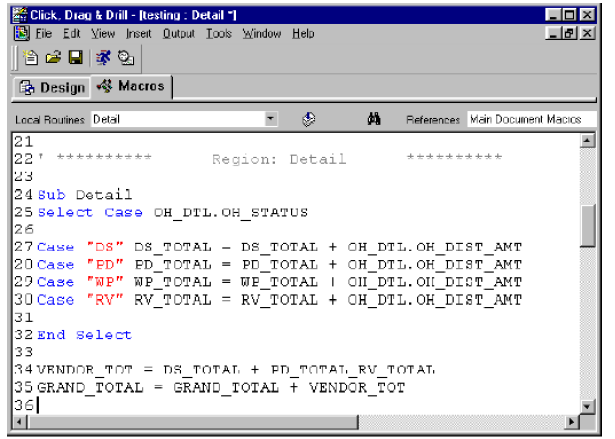
The next macro will keep a running total of all of the invoice types and a vendor net for each of the vendors with distributed amounts that are greater than or equal to zero. This macro also keeps a running total of the grand total that will appear at the end of your report. For each record, this macro looks at the invoice status and then depending on its value, adds it to the appropriate status total. For instance, if an invoice has a reversed "RV" status, the distributed amount for that invoice will be added to the RV_TOTAL. Next, the macro calculates the current vendor total and grand total.
Type the statements below after selecting the Detail macro option. Upon completing, click the Compile key and look for the "Success" message.
Select Case OH_DTL.OH_STATUS
Case "DS" DS_TOTAL = DS_TOTAL + OH_DTL.OH_DIST_AMT
Case "PD" PD_TOTAL = PD_TOTAL + OH_DTL.OH_DIST_AMT
Case "WP" WP_TOTAL = WP_TOTAL + OH_DTL.OH_DIST_AMT
Case "RV" RV_TOTAL = RV_TOTAL + OH_DTL.OH_DIST_AMT
Your screen should appear like the figure below:
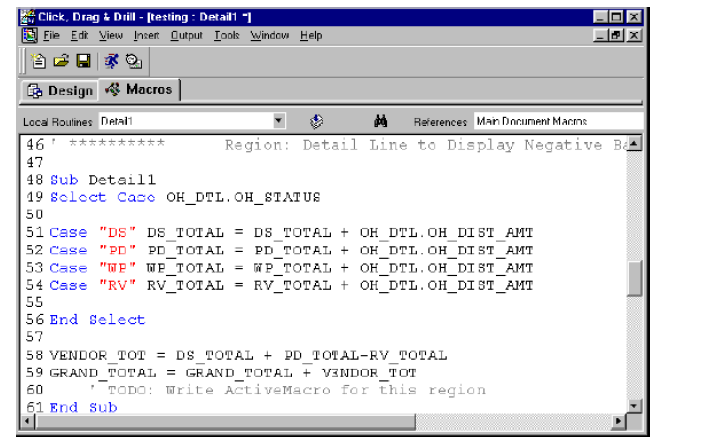
This macro will keep a running total of all of the invoice types and a vendor net for each of the vendors that have distributed amounts that are less than zero. Recall the Print Conditions that were established earlier in the process. This macro also keeps a running total of the grand total that will appear at the end of the report. For each record, this particular macro looks at the invoice status and then depending on its value, adds it to the appropriate status total. For instance, if an invoice has a reversed "RV" status, the distributed amount for that invoice will be added to the RV_TOTAL. Next, the macro calculates the current vendor total and grand total. Type the above statements after selecting the Detail1 Local Routine field. Upon completion, click the Compile key and look for the "Success" message. Note: You can use your copy & paste options to save on typing time.
Selection Criteria
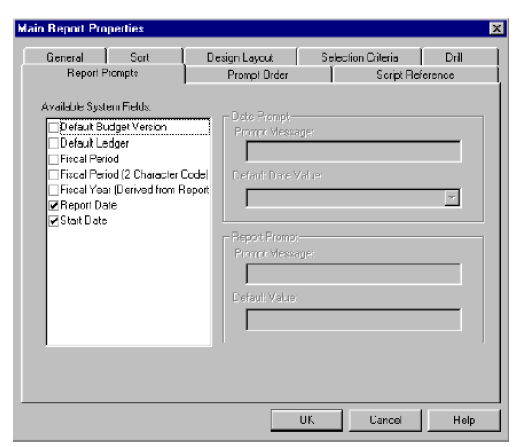
The next goal is to establish report criteria. This will allow the person who is runs the report to extract specific data using the criteria. In this example, the user will be prompted to enter a start date and report date. When the report is executed, only those records having an invoice date between the specified start date and the run date of the report will be reported.
Select the View menu from the Main Toolbar and then select the Report Properties command. The Main Report Properties window will appear. Select the Report Prompts tab on this window. By clicking the boxes, place a check mark next to the two fields labeled Report Date and Start Date. Then press OK. See the figure below for an example:
Press the Selection Criteria button from the main menu and then press the Run Report button. The Selection Criteria window will appear. Now, you are ready to define your report selection criteria. Click Add.
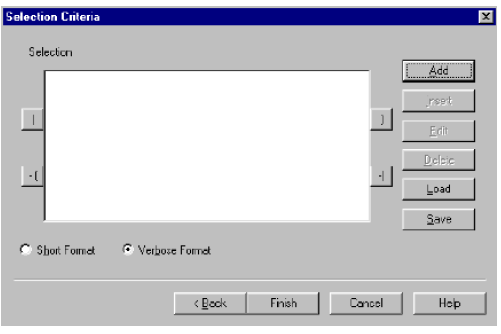
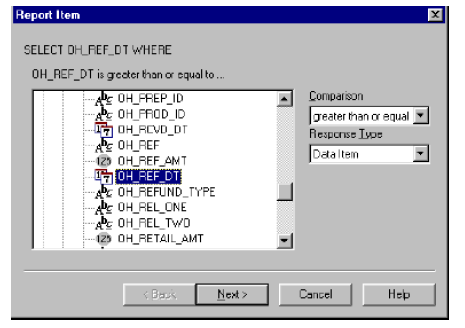
Expand your Database Items, select Invoice Date (OH_REF_DT), greater than or equal, data item and click Next.
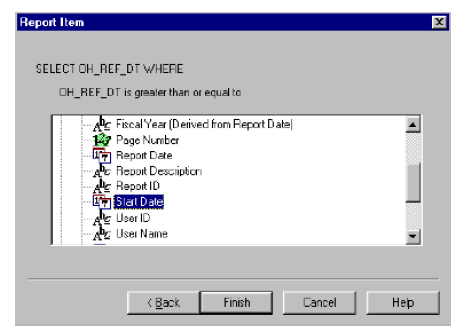
Expand your System Fields, select Start_Date and click Finish.
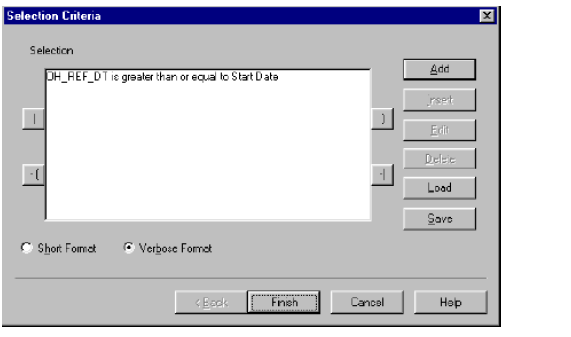
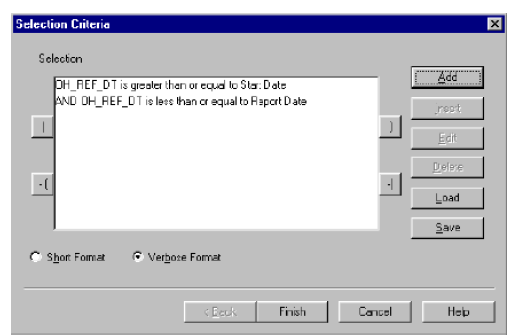
Your screen will resemble the diagram below.
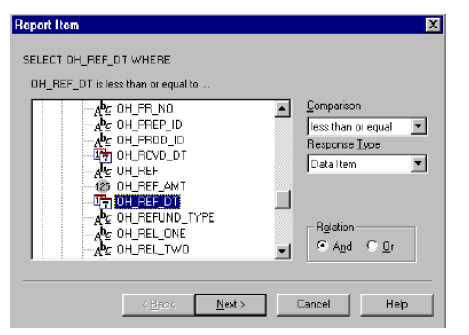
Select Add again and expand your Database Items, select Invoice Date (OH_REF_DT), less than or equal, data item and click Next.
Expand your System Fields, select Report_Date and click Finish.
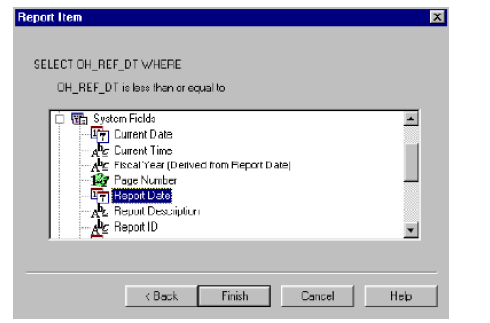
Your screen should resemble the above example. Click Finish.
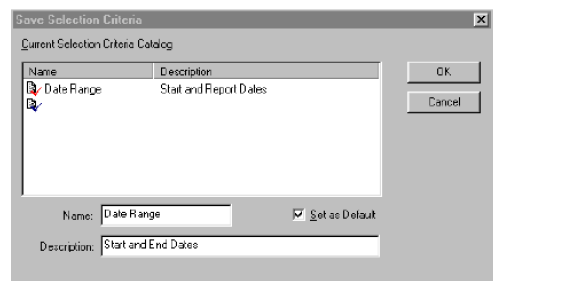
At the prompt, press Yes to save. Enter a name and description for your selection criteria. Select the Set as Default box and press OK. You can define multiple selection criteria for a single report. At run time, you will be asked to choose the desired selection criteria.
Report Enhancements
Add the following text fields to the Page Heading Region: Report Period, through, and Page #.
Drag and drop Start and Report Dates from the System Fields data list to the left side of the Page Heading Region as displayed in the example below. When your report is run, the start and report dates entered by the user will be displayed in these two fields.
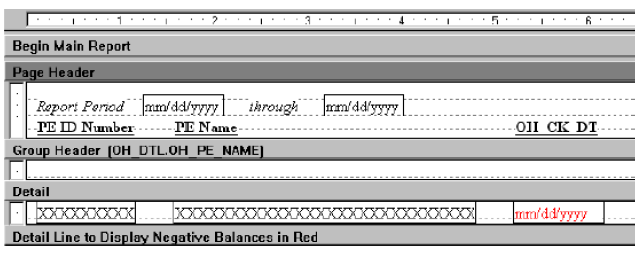
Drag and drop Page Number from the System Fields data list to the right side of the Page Heading Region as displayed in the example above. When your report is run, the system will automatically keep track of the number of pages in your report and display them in this field.
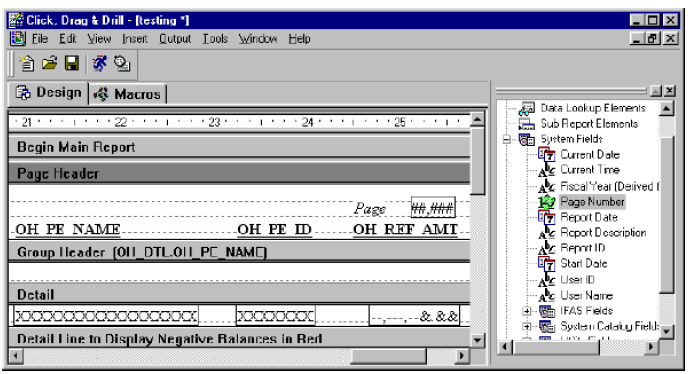
Drag and drop the following system fields to your footer region: current date, current time, report ID, report description, company name, and userid.
Now you are ready to run your report!
Run a Report
To prompt the user for selection criteria you must click the selection criteria button. Then, right-click on the design and click the button.
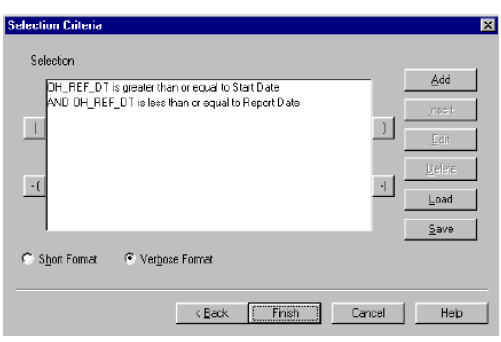
Your default selection criteria will appear; click Finish, and the following Report Prompts window will appear.

Enter your selection criteria (i.e., Start Date and End Date), and click OK. Your report will be executed.
