20.11.10 and later.
Overview
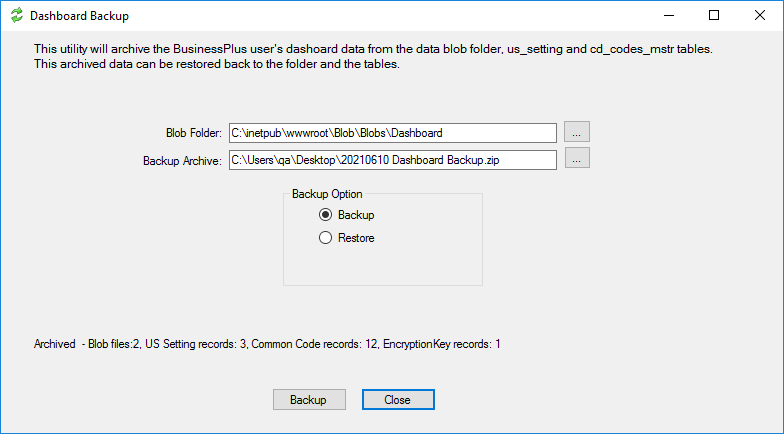
Use the Dashboard Backup tool to back up dashboard files. The tool backs up the following items on the source system:
-
Public dashboards
-
Private dashboards
-
NUAS common codes
-
Other information needed for a dashboard to function properly
When you use the tool to restore, it only imports items missing on the target account. No pre-existing detected data is overwritten. This tool does not assign users to associations to allow access to public dashboards. The NUUTZZ utility is used to assign users to dashboards associations.
Backup
-
Identify the dashboard file server. To identify the server where the blob files are stored, use the SQL statement:
select value from us_setting where subsystem = '@@' and area = 'BLOB_DATA' -
Copy the DashboardBackup.exe executable file to the bin folder of the webserver identified in step 1. The bin is default located at C:\Program Files (x86)\PowerSchool\Bin.
-
Determine the path to the dashboard JSON files. By default, JSON files are located at C:\inetpub\wwwroot\Blob\Blobs\Dashboard.
-
Launch the DashboardBackup.exe tool.
-
Enter the path to the Blob Folder.
-
Enter the path and name of the dashboard export Backup Archive file.
-
In the Backup Option section, select Backup.
-
Select Backup.
A confirmation message indicates items were archived.
Restore
-
Launch the DashboardBackup.exe tool.
-
Enter the path to Blob Folder.
-
Enter the path and name of the dashboard export Backup Archive file.
-
In the Backup Option section, select Restore.
-
Select Restore.
A confirmation message indicates items were restored.
-
Restart IIS.
User Association Import (NUUTZZ)
20.11.3 and later. While the NUUTZZ utility was added in BusinessPLUS 20.11.0, the User Association option for this utility is available only in BusinessPLUS 20.11.3 and later.
The NUUTZZ utility skips duplicate user associations. If a user already has the association mapped, this utility does not update the value.
Assumptions
-
Common Codes for the User Associations have already been configured. These common codes are identified with a Code Category NUAS.
-
Users and the associations needed for these users have been identified.
Common Code Setup
-
Create the NURL/ROLLOVER Common Code as follows:
-
Code Category = NURL
-
Code Value = ROLLOVER
-
Associated Code 3 = COMMA or TAB. This indicates the file delimiter.
-

Create Import Flat File
-
Create a new import flat file, for example, Assoc.txt.
The file extension can be either .csv (comma-delimited) or .txt (tab-delimited).
-
The flat file must contain the following column headers using the same delimiter.
-
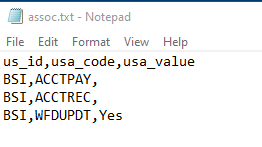
US_ID = BusinessPLUS User ID (Manage Users)
-
USA_CODE = Association Name (NUAS Common Code value)
-
USA_VALUE = Value to provide for User Association mapping. A value is not required for Dashboard mapping.
-
-
The example displays a comma-delimited flat text file for import that adds 3 User Associations to the BSI User. Only the WFDUPDT association has a value.
-
ACCTPAY and ACCTREC are dashboard associations.
-
WFDUPDT is a system association for Workflow Designer access.
-
-
Save the flat file.
Import User Associations via NUUTZZ
-
Import the flat file using the NUUTZZ Utility:
-
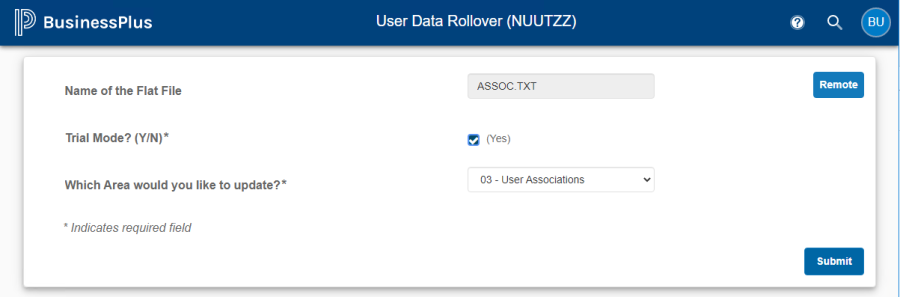
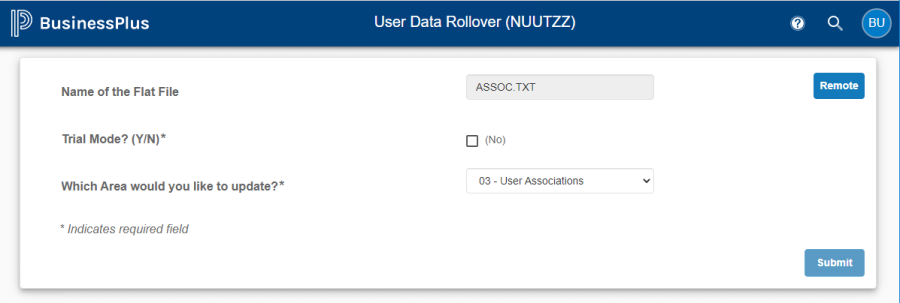
Launch NUUTZZ.
-
Select Location or Other to browse and select the flat import file.
-
If you want to run in trial mode, select the Trial Mode? (Y/N) checkbox.
Run in trial mode first.
-
Which Area would you like to update? Select 03 - User Associations from the list.
-
Select Submit.
-
Review the job tail sheet to identify errors or issues.
-
Repeat the process and clear the Trial Mode? (Y/N) checkbox to perform the import.
-
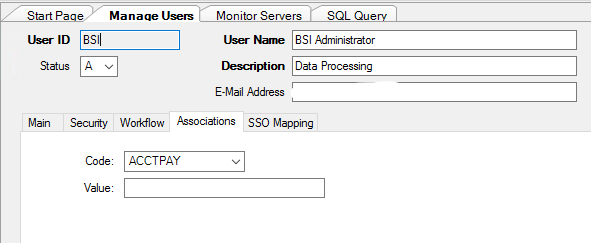
2. Confirm the new User Association on the Manage Users page.