Form Upload Settings
Introduction
Use the Upload Settings page to:
Identify the types of documents that employees may attach to or delete from their employee profile.
Upload forms for employees to download. Typical entries might include forms for requests that require a physical form to be submitted such as the I-9 form.
Menu Path
From the Employee Online menu, select Form Upload.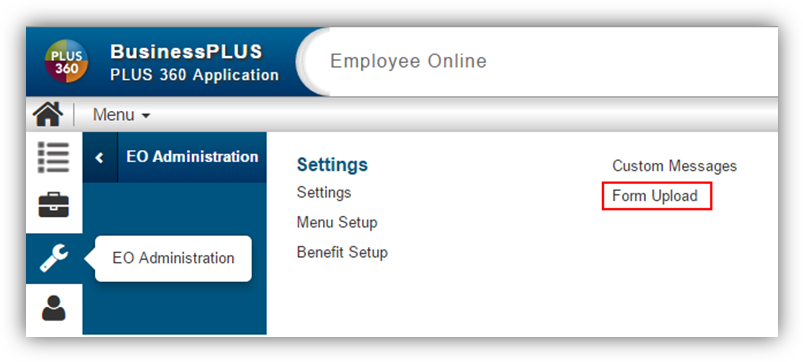
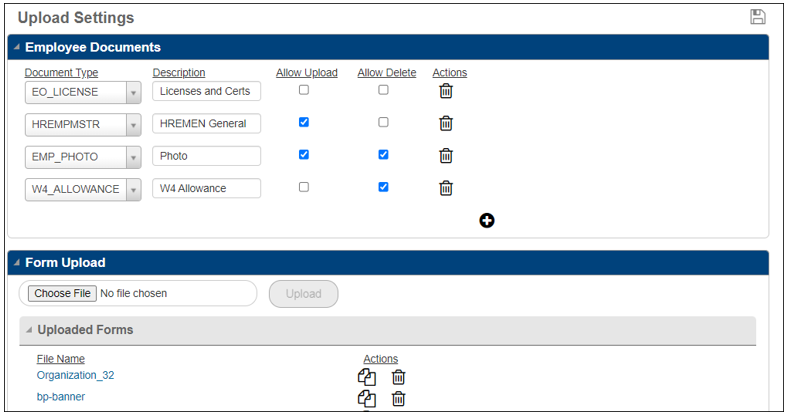
Employee Documents
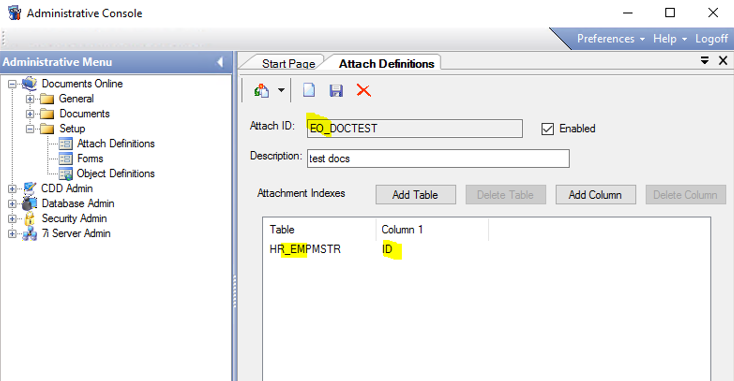
Document Types appearing in the drop-down list pulled from attachment definitions set up in Documents Online are all types attached to HR_EMPMSTR by ID.
Add an attachment definition in Documents Online, where the Attach ID has a prefix value of "EO_" attached to HR_EMPMSTR by ID.
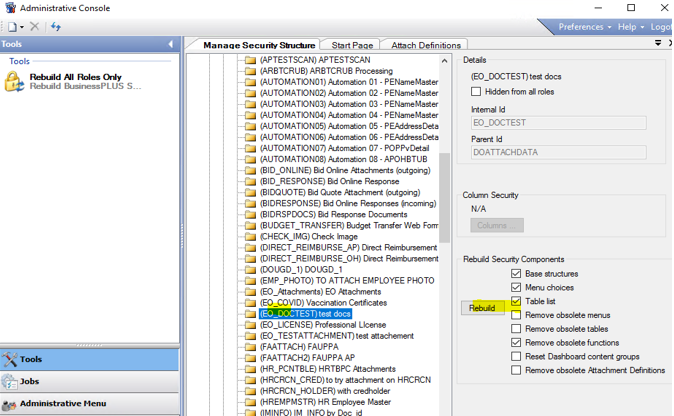
After a new attachment definition is added in Documents Online, the BusinessPlus security structure should be updated in the Administrative Console. From Security Administration menu, go to Setup, Manage Security Structure, then select Rebuild Security Components.
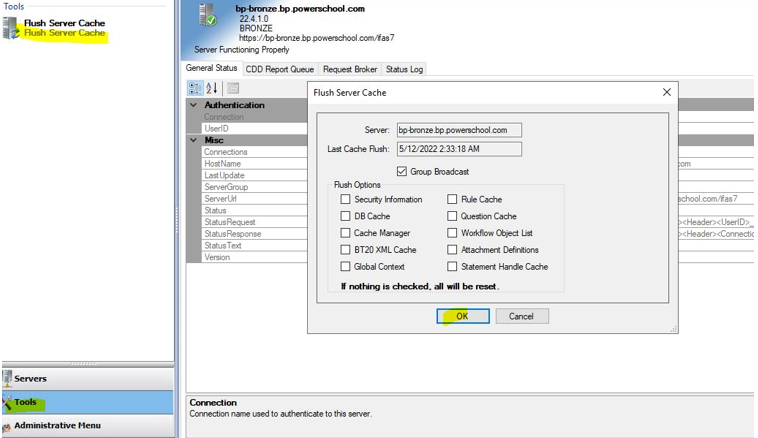
Flush the Server Cache from the Administrative Console. On the Administrative Console, navigate to 7i Server Admin, Utilities, then Monitor Servers. Click Tools, select Flush Server Cache and click OK.
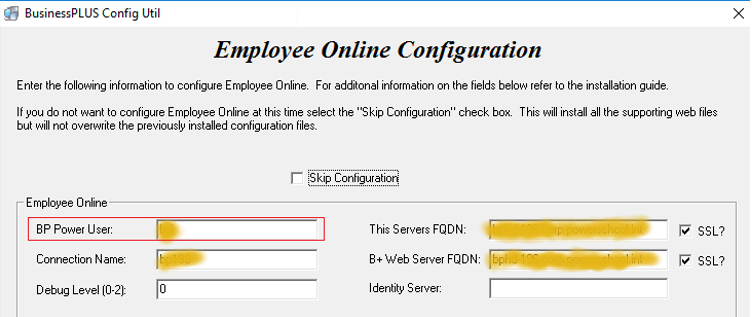
Rebuild the security for the EO power user ID. The Power User Id needs to be rebuilt for the new EO since the power user's security is required to process the upload and download requests. BP Power User Id can be found in the Employee Online Configuration. Get the BP Power User ID from Employee Online Configuration, then rebuild the user account.
In EO, the attachment definitions appear in the Document Type drop-down list on the Form Upload page. The values stored behind the drop-down item are the ATTACH_ID and ATTACH_DESC. The Description field defaults to the value from Documents Online but allows for modification. The description displays to the user as the card title on the employee attachments page.
Allow Upload: indicates whether the employee will be allowed to upload documents.
Allow Delete: indicates whether the employee will be allowed to delete documents.
Trash can: deletes the Document Type entry.
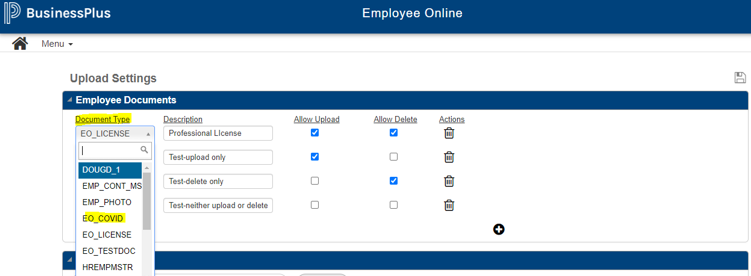
Check the newly added attachment definitions on Employee Online. From the EO Administration menu, select Form Upload. To add a Document Type, click the plus ( + ) sign, then the Document Type drop-down list. Click the desired item, change or verify the description and select the appropriate checkboxes, and then click Save. To delete a Document Type, click the trash can icon. The Document Types added here will be available for employees to select from/use on the My Documents page in Personal Information, Attachments.

Form Upload
On the Form Upload page, the user can choose a file from their local drive and upload it to Documents Online. Supported characters for a file name are letters, numbers, hyphen ( “-” ), underscore ( “_” ), parentheses ( “(“ , ”)” ), dollar (“$”) and periods ( “.” ).
To start the upload process, select the "Choose File" button.

Select the file from the local drive and select "Open." The file name is displayed in the text field. Select the "Upload" button.

When the file has been successfully uploaded, the file name will appear in the File Name list on the Uploaded Forms card.

Copying Forms
Under the "Actions" list, select the Copy button.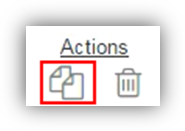
The Copy window will give the user a direct link of the form or image in Documents Online. 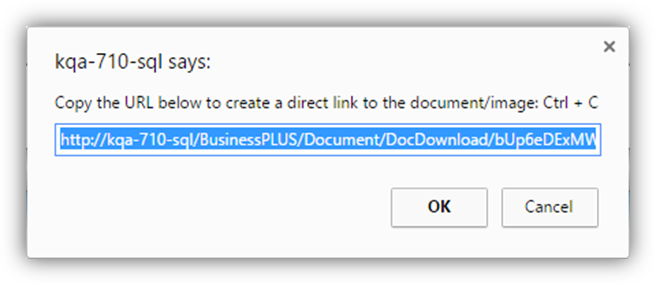
With the entire link highlighted, either hit Ctrl+C on the keyboard to copy the link, or right-click the link and select "Copy." 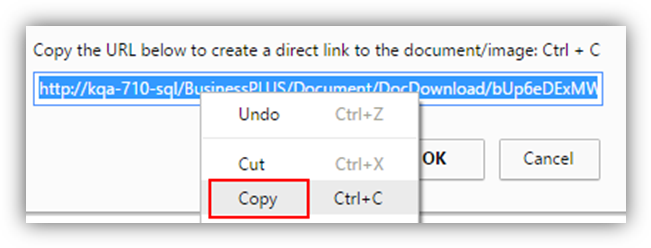
Click OK to close the window. The copied link is now available for use in the Custom Menu items or Custom Messages.
