Setting Up User Security in Timecard Online
Access to Timecard Online requires a BusinessPLUS user ID be set up in the Administrative Console Security module and assigned to the appropriate Timecard Online access class (Association).
Create new Associations in Nucleus Common Codes, menu mask NUUPCD. There are two basic access classes:
- NUAS/TIMECARD access allows an employee to enter his/her own time entries.
- NUAS/TIMEKEEP access allows an employee to enter time for all employees for whom he/she has security access.
NUAS/TIMECARD Common Code
Code Category: NUAS
Code Value: TIMECARD for the association used to allow access to the Timecard only
Short Description: IDENTITY for dashboard identity associations
Medium Description: Timecard Online - Employee
Long Description: ../timecard/default.aspx
NUAS/TIMEKEEP Common Code
Code Category: NUAS
Code Value: TIMEKEEP for the association used by timekeeper
Short Description: IDENTITY for dashboard identity associations
Medium Description: Timecard Online - Timekeeper
Long Description: ../timecard/default.aspx
NUAS/FINANCE Common Code
If the FINANCE association is not already created, add it now by adding NUAS/FINANCE common code in NUUPCD. Timekeepers will need this association assigned in NU Manage Users, along with the TIMEKEEP association.
Managing Users in Timecard Online
User security is set up in the Administrative Console under Security Admin, Setup.
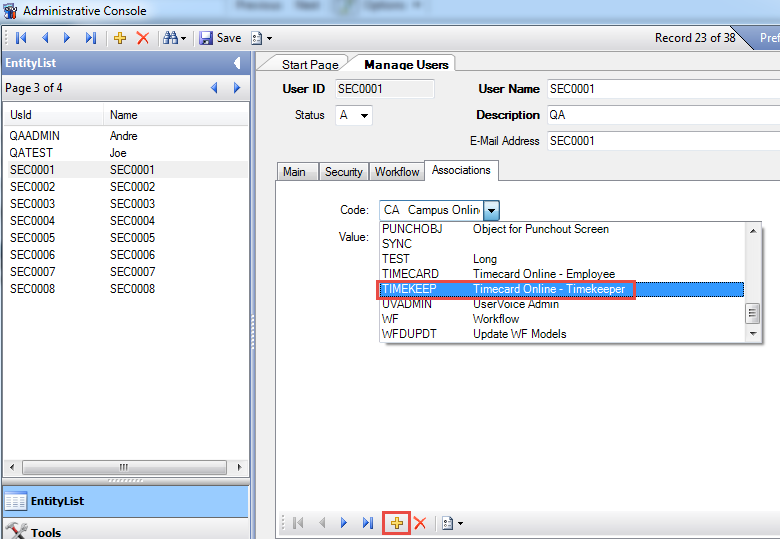
- Double-click "Manage Users." The Manage Users window will open.
- Click Associations tab. Add the appropriate association.
Employee Setup:
- Add TIMECARD association. Enter the employee's ID number in Value field.
Timekeeper Setup:
- Add TIMEKEEP association. Enter the employee's ID number in Value field.
- Add FINANCE association.
Timekeeper Security
Restricting security by timekeeping group.
Example of Timekeeper Security with limited role in Manage Security Roles:
- Log on to Administrative Console.
- Select Manage Security Roles.
- Add New Role ID. Sample name: "TIMEKEEPER."
- Check the following:
- Role ID = TIMEKEEPER
- Role Title = TO Timekeeper
- Security Object = HR_PE_MSTR
- Make sure "Derived" is unchecked
- All other boxes should be checked
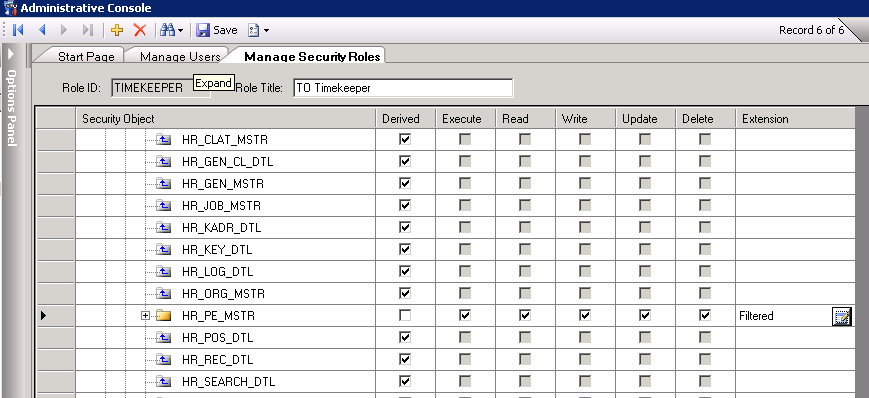
5. Click on Extension "Filtered."

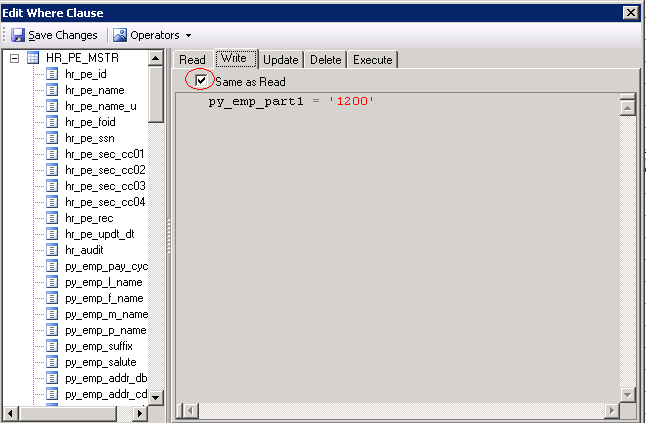
6. The Edit Where Clause window will open. Update the "Read" tab. Use the table on the left and create the SQL logic needed to appropriately restrict the security. In the example below, the timekeeper is restricted to Part1 = 1200, where Part1 is set to Department (see the Define Timecard Groups section for defining Part1).
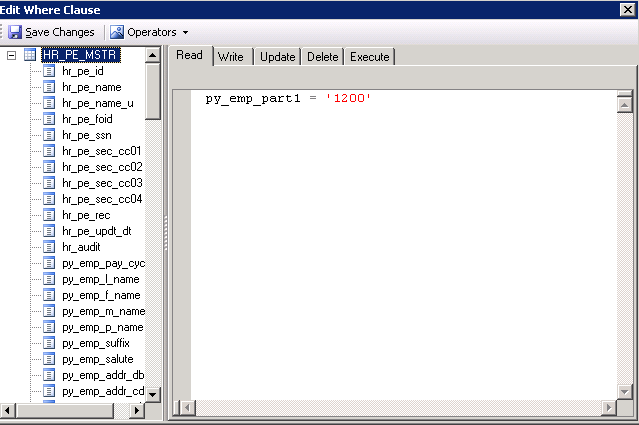
7. If the SQL rule is the same for Write, Update, Delete and Execute:
- Click on each tab (Write, Update, Delete and Execute)
- Select the "Same as Read" checkbox
- Click "Save Changes"
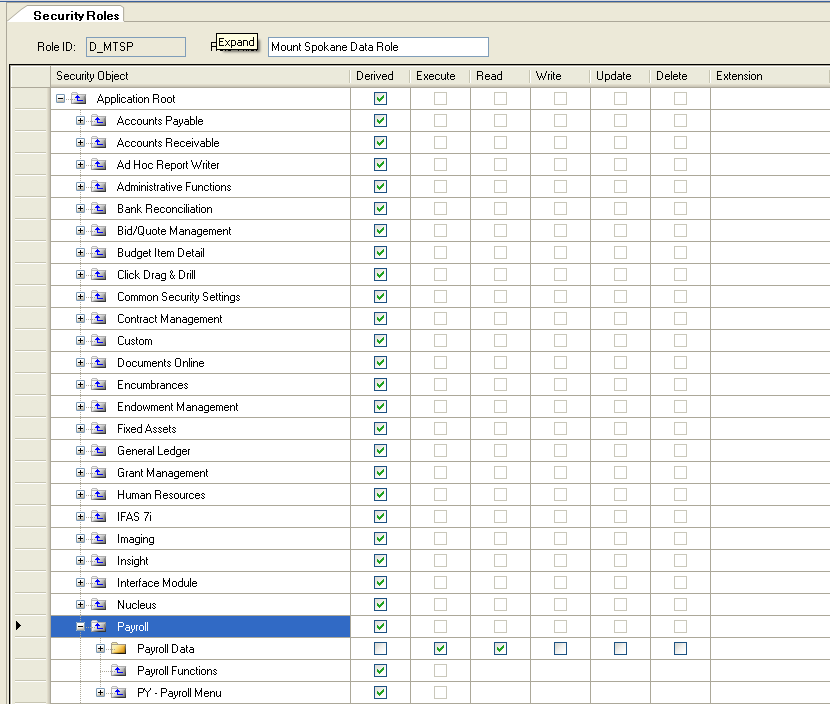
8. To allow access to standard Payroll CDD reports, select Execute and Read permissions for Payroll Data.
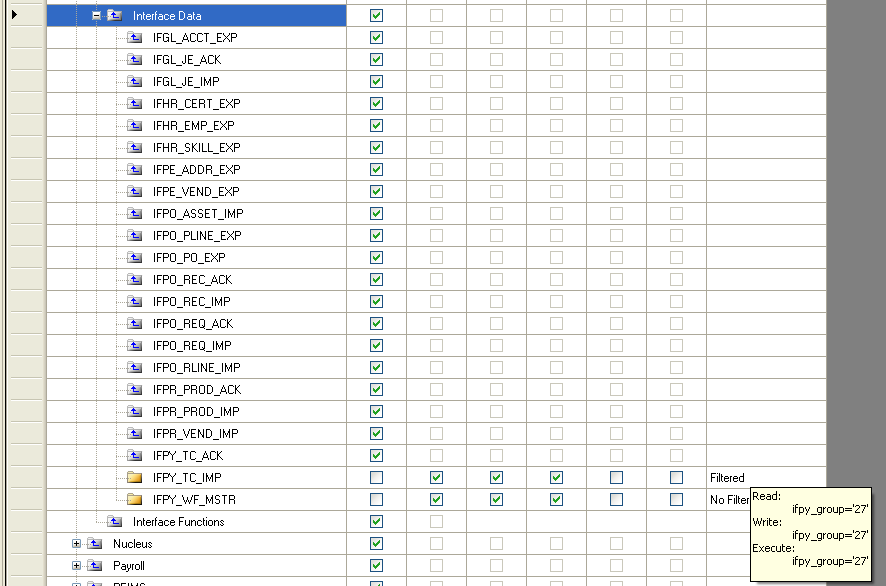
9. To allow Interface Data access: IFPY_TC_IMP – Execute, Read, Write, filtered on ifpy_group.
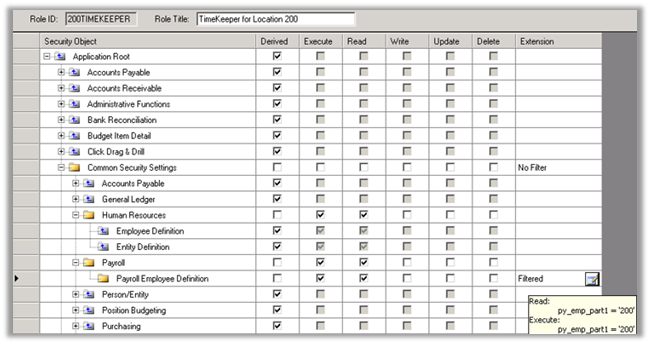
10. To allow Payroll Common Security access: Payroll Employee Definition – Execute, Read, filtered by Part.
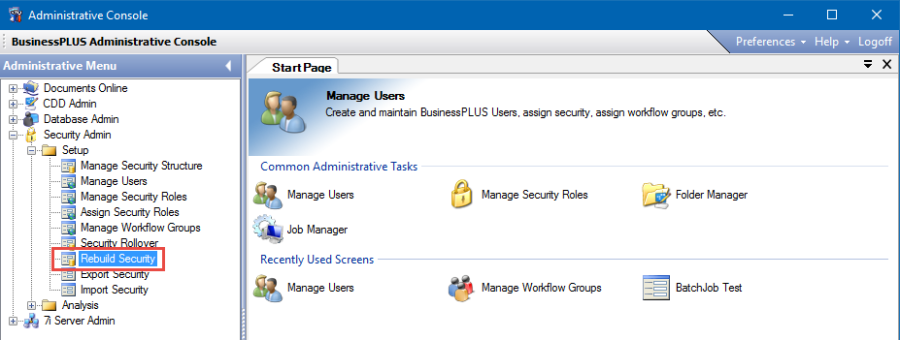
11. To allow Workflow security: IFPY_WF_MSTR – Execute, Read and Write (no filter). Rebuild Security after updating Workflow security:
- Click on Start Page tab
- Click on Rebuild Security tab for the ID(s)
Note : It may be necessary to select specific users if only rebuilding for specific IDs.
