Setting Up Workflow for Timecard Online
BusinessPlus Workflow can be set up to allow a supervisor to review and approve timecard entries prior to acceptance. Using Workflow with Timecard Online is optional. Though typically each client will customize its own Workflow setup, a standard, basic Workflow model named TO.NET_APPROVAL is delivered with the product as a starting point.
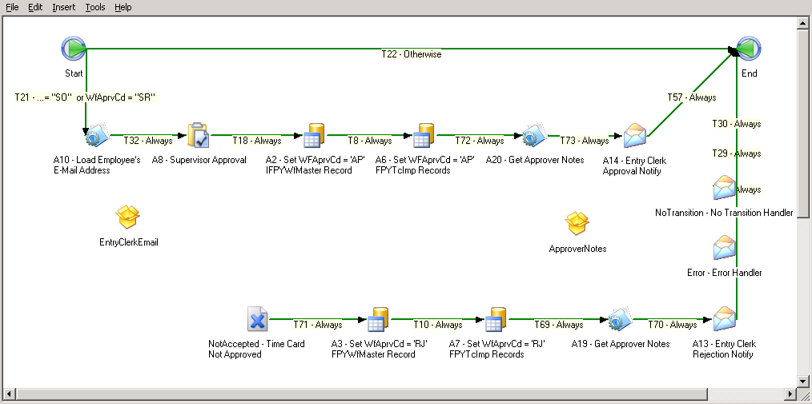
The Workflow model may be set up to notify employees and timekeepers when entries are rejected or when approved. The notification process uses the email address stored with the user's ID configuration. The Create New User IDs (NUUTNU) utility has an option to populate that email address from the one that is stored in HR.
Modifying the Standard Workflow Model
Verify that the standard TO Workflow model has been imported into Workflow Designer.
Log in to Workflow Designer. This PC Product is usually found under Start > All Programs > PowerSchool > Workflow Designer.

Once in Workflow Designer:
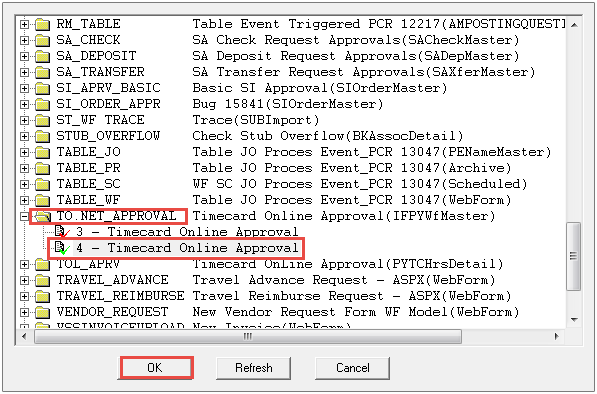
- Click File, Open to view all workflow models.
- Click on the "TO.NET_APPROVAL" folder to expand it.
- Click "Timecard Online Approval" to highlight the model. Note: If this model has not been loaded, click File, Import, select the workflow file: TO.NET_APPROVAL.wdl. The sample workflow model should exist on the 7i webserver: C:\Program Filesdirectory\WFModels\TimecardOnline\TO.NET_APPROVAL.wdl, where directory is the name of the directory defined at install time.
- Click "OK" to open it.
The workflow model may look like this:
Timecard Online Supervisors Setup
To set up supervisors to approve timecards:
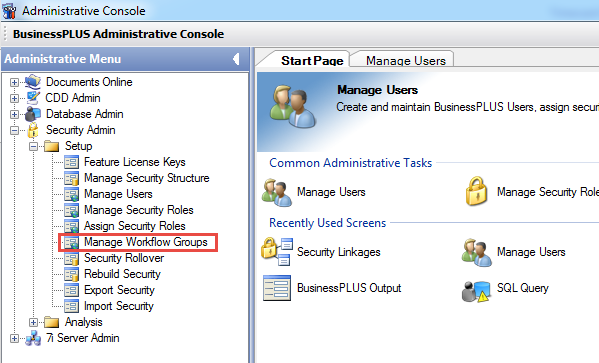
- Open Administrative Console.
- Double-click Security Admin.
- Double-click Setup.
- Double-click Manage Workflow Groups.
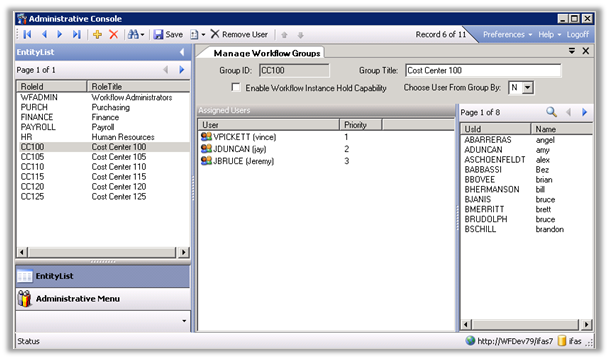
5. Create and assign approvers to Workflow groups.
6. In Administrative Console, verify that the user is assigned to the security role.
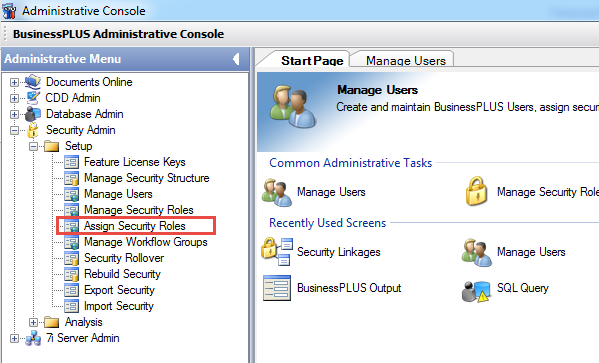
7. Double-click Security Admin, Setup, Assign Security Roles. The Assign Security Roles window will open.
8. Select the role name from the Entity List panel.
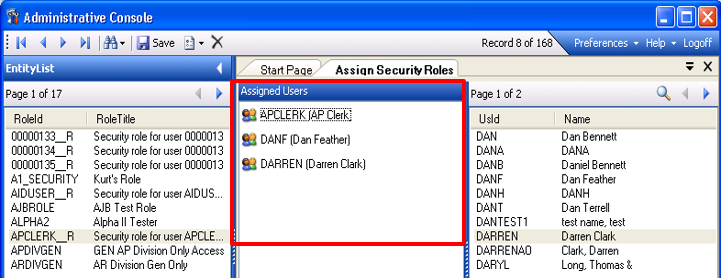
9. If the user ID is not listed in the Assigned Users panel, double-click the user ID from the available users list at the right.
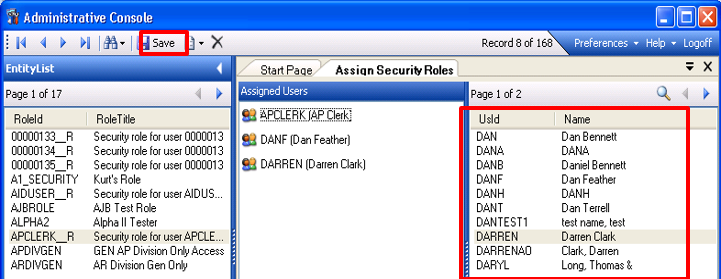
10. The user ID will be moved the Assigned Users panel.
11. Click the Save icon to save.
12. In Administrative Console, rebuild the user's security.
13. Add the Workflow Groups created in the Administrative Console to the A8 activity of the TO.NET_APPROVAL Workflow model in Workflow Designer. Double-click the clipboard icon (Task List) to display the Activity Properties.
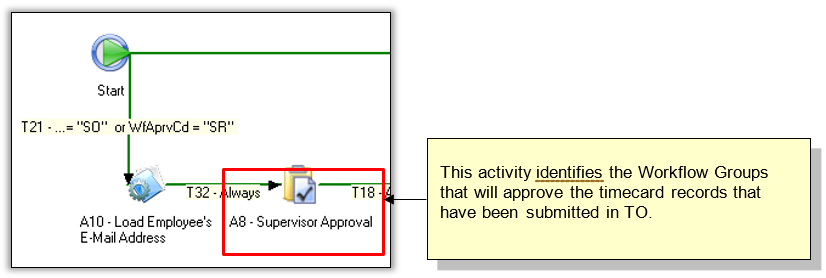
14. Click "Set Conditions…" next to the Many radio button to open the approval matrix.
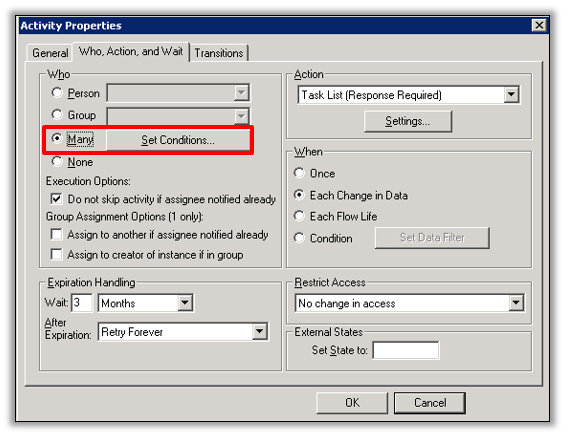
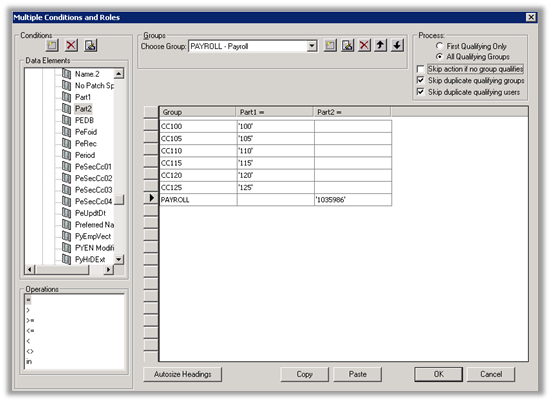
15. Modify the approval matrix. Conditions can be added from the left panel. Workflow Groups can be added from the top middle panel.
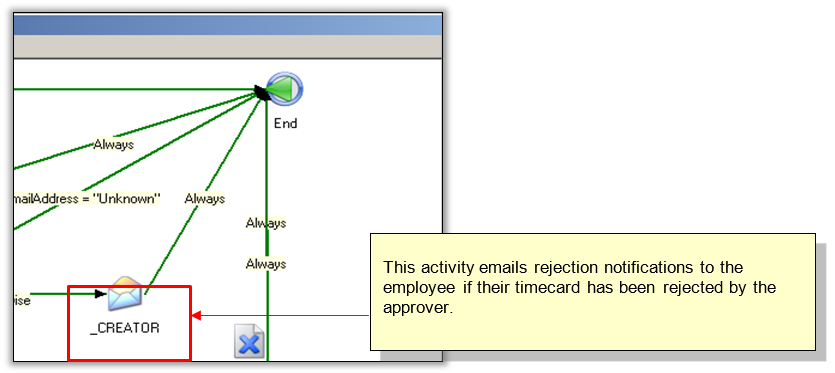
16. Disable email notifications in CREATOR to avoid accidently emailing rejection notices to employees while testing.
17. Click on the envelope icon that says _CREATOR to display the Activity Properties window.
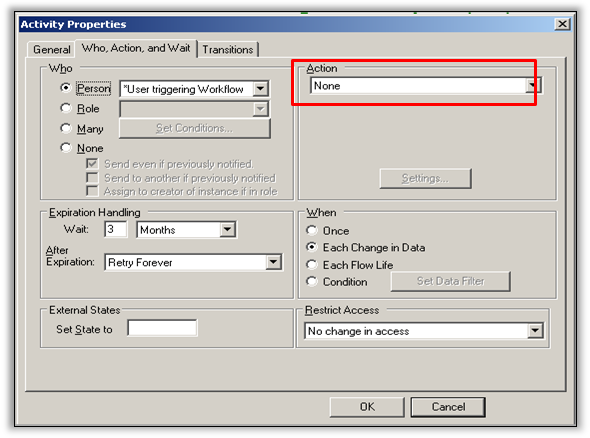
18. Change the Action to "None." Click "OK" to save.
19. To save the Workflow Model, click File > Save.
