Attachment Definitions
The attachment definition controls which tables and columns will be used to link Web Form attachments to the appropriate records. Use attachment definitions that are designed for the specific Web Form. Using existing definition files may cause unforeseen issues that could affect data integrity.
Creating the Attachment Definition
Attachment definitions are defined in the Administrative Console. The user must have "Execute" permissions with an appropriate security role for Documents Online.
Within the Administrative Menu, select Documents Online > Setup > Attach Definitions. The right pane changes to display the Attach Definitions screen.
Select the Add Definition button
. This will set the screen to "Add Mode."
Add each of the definitions as shown in the Productivity Pack Attach Definitions (below).
Press the Save button after all the information is entered.
Productivity Pack Attach Definitions
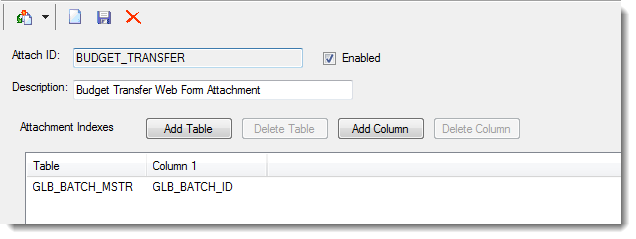
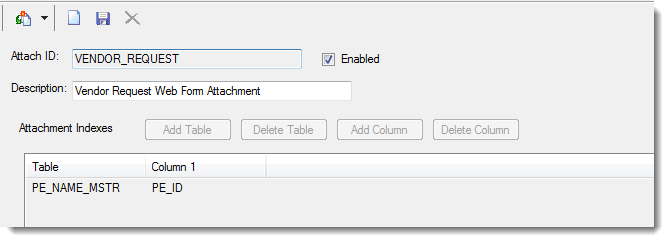
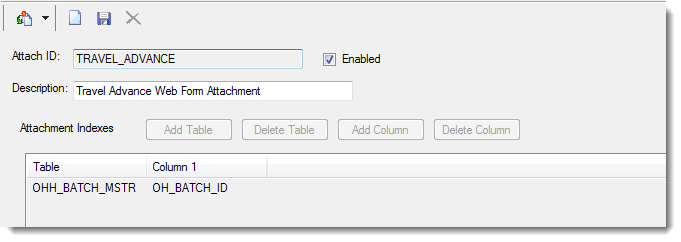
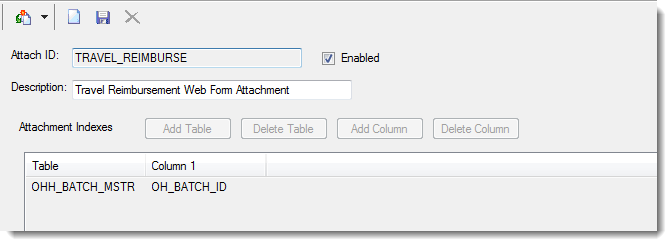
For each Web Form, enter the Table and Column information as shown below.
BUDGET_TRANSFER
VENDOR_REQUEST
TRAVEL_ADVANCE
TRAVEL_REIMBURSE
DIRECT_REIMBURSE (OH Batch)
.png?inst-v=2c7ddb96-519d-4866-9261-a55495db1def)
DIRECT_REIMBURSE (AP Batch)
**Add a second column for the DIRECT REIMBURSE attachment definition. Follow the same steps as above and click the Add Column button to add OH_REF.
%20Add%20a%20second%20column%20for%20the%20DIRECT%20REIMBURSE%20attachment%20definition.%20Follow%20the%20same%20steps%20as%20above%20and%20click%20the%20Add%20Column%20button%20to%20add%20OH_REF.%20Opens%20image%20in%20full%20screenOpen%20%20.png?inst-v=2c7ddb96-519d-4866-9261-a55495db1def)
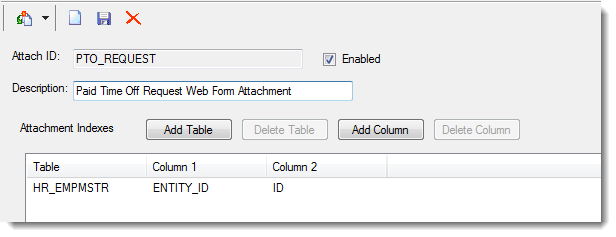
PTO_REQUEST
Add a second column for the PTO_REQUEST attachment definition. Follow the same steps as above and click the Add Column button to add ID.
Rebuild Security
Creating an attachment definition creates a node in Manage Security Roles for Documents Online, Databound Attachments node. The Role-Based Security controls the ability to attach (Write) or view (Read) images.
Once all Attachment Definitions are added and saved, rebuild the security structure to incorporate the new nodes into the security.
Next, rebuild the user security. The security for the users can be rebuilt By Role or By User.
Flush Cache or Restart Data Processing Services on 7i Servers
On the Administrative Menu, select 7i Server Admin > Utilities > Monitor Servers.
In the Monitor Servers window, select Tools (located in the lower-left portion of the screen).
Double-click the Flush Server Cache tool.
Verify the Group Broadcast box is checked on the next window and click OK.
A message will display to confirm the server cache was flushed.
