Administrative Console
The purpose of the Administrative Console is to centralize the common setup and administrative functions into one application. It is assumed that this tool will only be made available to a small subset of users at a client site as it provides access to some very sensitive configuration options and system access. While the software uses a local Connection Manager connection by default (for its data access), some of the plugins loaded in the Administrative Console also require a connection to a functional 7i server.
Start Page
The Start Page plugin to the Administrative Console provides a method of easily accessing commonly used plugins. The top list is the default list of common plugins shipped with the software. The bottom list is built based on the most recent usage of the Administrative Console on an individual user's machine. This list is dynamic and will be based on the usage pattern before the application was last closed. The number of plugins to track is controlled by the Console settings in the Settings dialog found under Preferences.
The Administrative Menu located on the left side of the application provides a basic menu system for organizing the plugins. Double-clicking a plugin initializes and loads the plugin in the panel on the right of the application in a separate tab. Many different plugins can be open at the same time. Be aware that each opened plugin will increase the amount of memory being actively used by the application.
When finished using a plugin, click the "X" button on the tab strip at the far right to close it. To shut down the entire Administrative Console application, click the Logoff menu option at the top right of the menu bar.
The status bar at the bottom of the application tracks the current connections. By default, the database connection will show the BusinessPlus connection selected by the user when first connecting. If a plugin is loaded that uses a connection to 7i, a 7i server connection will also be initiated and will show in the status bar to the left of the database connection.
Preferences
Settings Dialog
The Setting dialog window is accessed by selecting Preferences > Settings in the menu bar. The dialog provides access to both the settings specific to the currently active plugin as well as the general settings for the Administrative Console.
Settings
This tab provides access to the application's current GL and JL ledger. Changing this default will change the ledger defaults used by any plugin, or resulting report, that references the default ledger.
Console
This tab controls if the Start Page will be shown at startup and how much history to maintain. The Start Page is the initial plugin loaded into the Administrative Console and provides a shortcut to Common Administrative Tasks (plugins).
Plugins
The Administrative Console also allows BusinessPlus to write custom plugins and deliver them outside of the standard software release. In that situation, those plugins can be added to the user's current plugins menu by using this tab. If you have a custom plugin delivered, instructions will be provided with the delivery of the plugin assembly. This feature is only for use by BusinessPlus and should not be used to load any other types of plugins.
Connection Manager
The Connection Manager is accessed from the Preferences menu. Users can create new connections or edit existing connections. Changes to existing connections can have a significant impact on the system and should be done carefully.
Help
About
Accessed from the Help menu, the About window provides access to information about the Administrative Console. The BusinessPlus tab displays information relating to the current connection. This information can be beneficial when answering BusinessPlus support questions.
Enable Tracing
Plugins that are built on .NET technology can be traced using the .NET built-in tracing. To enable tracing, go to the Help menu on the common menu and select Support > Enable Tracing.
Settings
On the Settings tab of the Diagnostics dialog box, check the boxes next to the different tracing names to enable the tracing for that section of code. The type of tracing to use will most likely be suggested by a resource at PowerSchool as part of the troubleshooting process. Some options, such as Exception Tracing, will enable a different tab specific to their type of tracing. This is also true for Web Request Tracing.
Trace Levels
In addition to specifying the type of tracing to enable, users can select how much tracing information to show.
All | This checkbox enables all the various trace types at once. |
Critical | These messages only appear for critical errors that will most likely leave the application in a questionable running state. |
Error | These messages are errors the system generates such as business rule errors that are not necessary terminal. |
Warnings | These are warnings typically generated by business rules. |
Information | These are general informational trace messages. |
Verbose | This option can result in large amounts of trace information depending on the Plugin. |
Registry
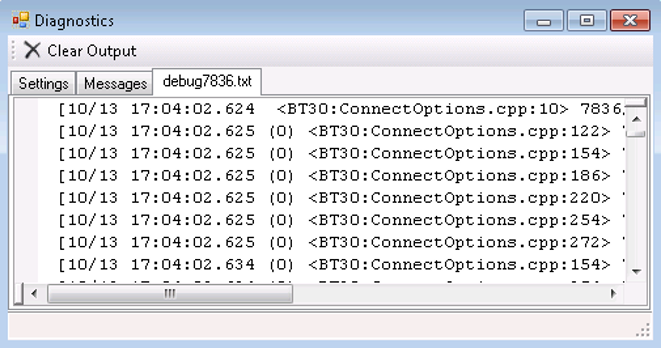
If the standard tracing for the software has been enabled in the local registry (HKLM\Software\Bi-Tech\Common\Trace) an additional tab will appear monitoring the trace file for the current process. This level of tracing must be enabled in the registry prior to launching the Administrative Console.

Clear Output
The Clear Output button can be used to clear out the current trace information. This is useful in situations where the amount of trace information has built up to the point where it is becoming difficult to review.
